What You Need
- A Linux machine, real or virtual. I used BackTrack 5 R1 virtual machine.
- A second machine with Nmap installed. I used a Win 8 Developer Preview virtual machine.
Starting the Linux Machine
Start your machine as usual. Open a Terminal window. In a Terminal window, enter this commands, and then press Enter:
ping samsclass.info
Make sure you are getting replies, and then press
Ctrl+C to stop the pings.
In a Terminal window, enter this commands,
and then press Enter:
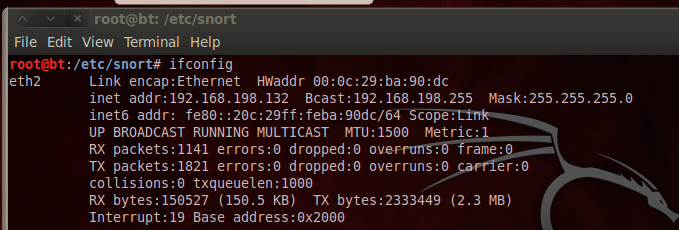
ifconfig
Find the interface that goes to the Internet and make a note of it.
In my case it is eth2, as shown below:
Configuring Snort to Detect Pings
Snort starts with a long set of default configurations, but we will start with a very simple ping detector. In a Terminal window, enter these commands, pressing Enter after each one:Enter this line, as shown below:cd /etc/snortnano snort-test.conf
include /etc/snort/icmp-test.rules
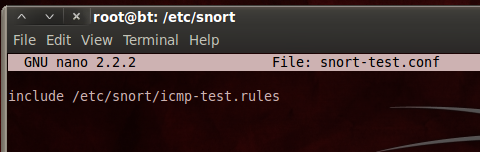 Save the file with Ctrl+X, Y, Enter.
In a Terminal window, enter these commands, pressing Enter after each one:
nano icmp-test.rules
Enter this line, as shown below:
alert icmp any any -> any any (msg:"ICMP Packet"; sid:477; rev:3;)
Save the file with Ctrl+X, Y, Enter.
This is the structure of an alert:
<Rule Actions> <Protocol> <Source IP Address> <Source Port> <Direction Operator> <Destination IP Address> <Destination > (rule options)
Table: Rule structure and example
| Structure | Example |
|---|---|
| Rule Actions | alert |
| Protocol | icmp |
| Source IP Address | any |
| Source Port | any |
| Direction Operator | -> |
| Destination IP Address | any |
| Destination Port | any |
| (rule options) | (msg:”ICMP Packet”; sid:477; rev:3;) |
Running Snort With Only One Rule
In a Terminal window, enter this command, followed by the Enter key:
snort -i eth2 -c /etc/snort/snort-test.conf -l /var/log/snort
Note that the last switch is a lowercase L, not the numeral 1.
Use your interface name, which may be different from eth2.
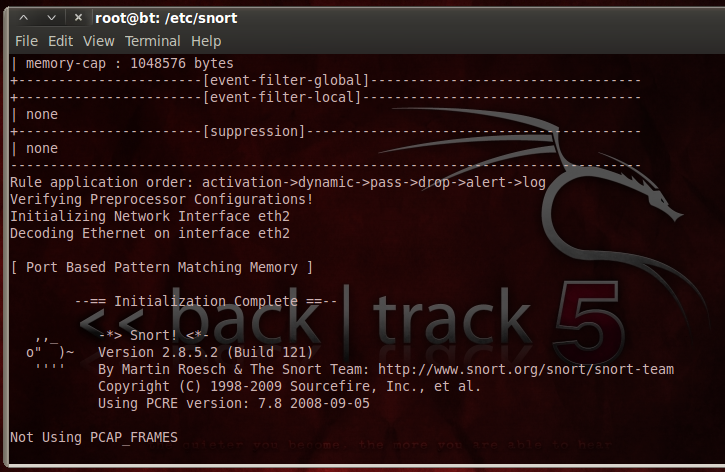
Snort starts, showing an "Initialization Complete" message, as shown below:
Open another Terminal window or tab and enter this command, followed by the Enter key:
ping -c 1 8.8.8.8
In the Terminal window,
enter this command,
followed by the Enter key:
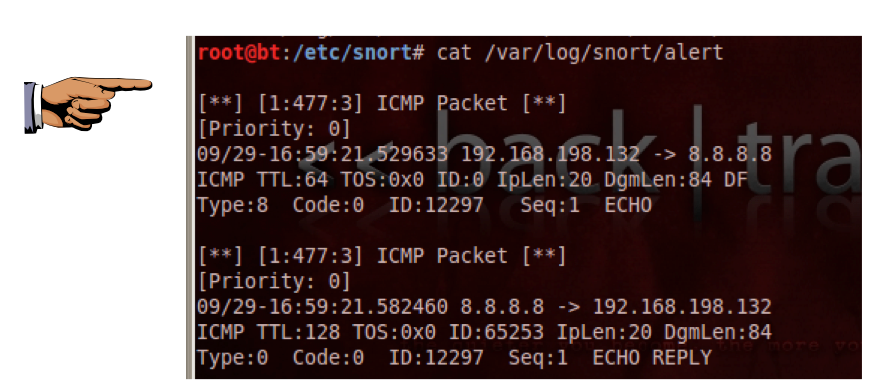
cat /var/log/snort/alert
You should see two alerts, as shown
below. The first one shows
an outgoing ICMP type 8 ECHO request,
and the second shows an incoming
ICMP type 0 ECHO response.
Saving the Screen Image
Make sure you can see the ICMP Type:8 and ICMP Type 0: packets in your alert file. Save a screen capture with a filename of "Proj 15a from YOUR NAME".Stopping Snort
In the Terminal window or tab running Snort, press Ctrl+C. Snort prints out a page of statistics about the packets it saw, as shown below: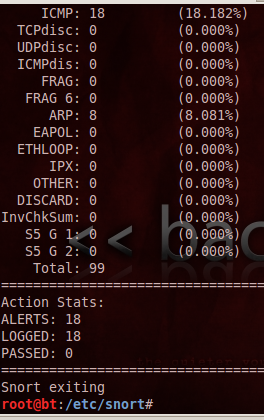
Running Snort with Default Rules
In a Terminal window, enter this command, followed by the Enter key:
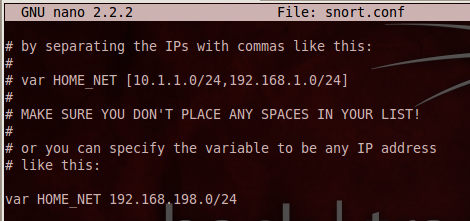
nano /etc/snort/snort.conf
In the text editor, scroll down and find
the line beginning with var HOME_NET.
Set this value to your subnet address, as shown below.
If you are unsure what your subnet address is, open a
new Terminal window or tab and execute the ifconfig command
to find out.
Save the file with Ctrl+X, Y, Enter.
In a Terminal window, enter this command, followed by the Enter key:
snort -i eth2 -l /var/log/snort -c /etc/snort/snort.conf
Note that the second switch is a lowercase L, not the numeral 1.
Use your interface name, which may be different from eth2.
Snort starts, showing an "Initialization Complete" message. Open another Terminal window or tab and enter this command, followed by the Enter key:
watch "tail /var/log/snort/alert"
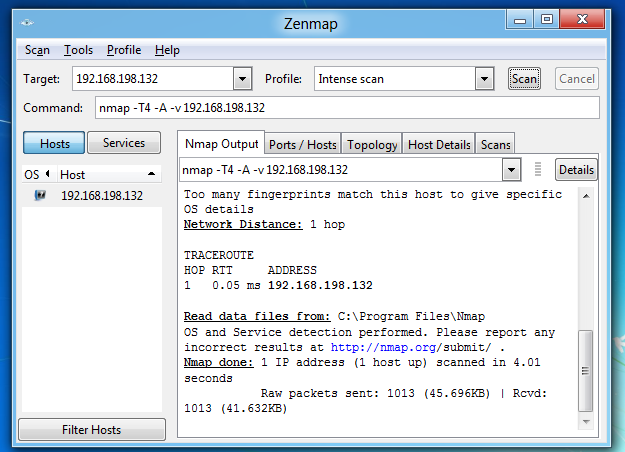
On your other computer, run a default Nmap
scan of your Linux machine,
as shown below:
You should see messages scroll by on the Linux machine as snort sends alerts about the scans.
When the scan is complete, click in the Linux window showing the alerts, and press Ctrl+C to stop the watch command.
In a Terminal window, enter this command, followed by the Enter key:
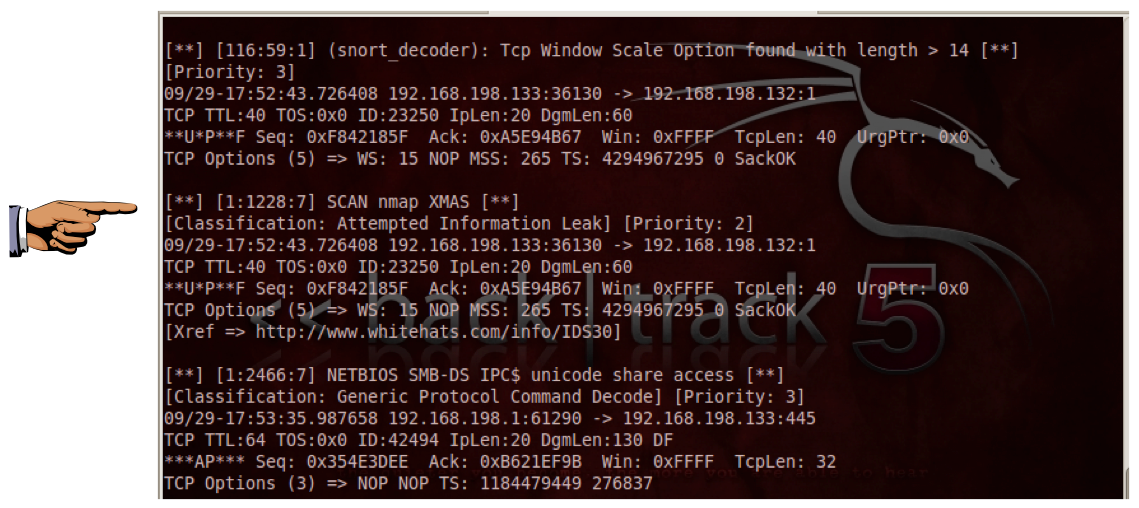
cat /var/log/snort/alert
You should see several alerts detecting various
phases of the nmap scans, as shown below:
No comments:
Post a Comment