
This crackme was downloaded at http://www.osix.net/modules/geek/reverse.php, a challenge site.
The tools I use during this tutorial are:
OllyDbg 1.10 - http://www.ollydbg.de/
API Help files - http://tuts4you.com/request.php?258
If you need to “install” your API help files, download and extract the files then point Olly where to read the help files from:
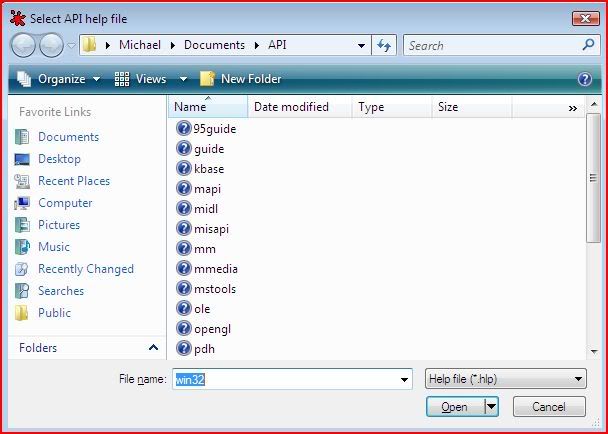
Select win32.hlp. If you are on Windows Vista, you will need an additional download to be able to use 32 bit HLP files:
http://www.microsoft.com/downloads/details.aspx?FamilyId=6EBCFAD9-D3F5-4365-8070-334CD175D4BB&displaylang=en
I have attached to this thread the following:
g1.exe - The target we are reversing.
Keygen.exe - A keygen I made to get a serial for this application.
During this tutorial I will assume you have basic knowledge of 32, 16 and 8 bit registers and how they interact with each other, basic assembly, flags, the memory stack and Win32 APIs or otherwise the API help files.
If you need any help on any of this, post below and I’ll see what I can do to help (don’t be scared to say you don’t know anything about all of the above !).
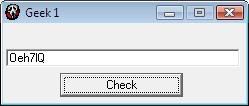
First of all, we examine our target, so run the executable and we get this:
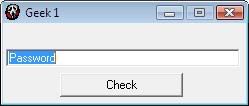
Enter a couple of serials and unless you’re lucky enough to guess the right one you’ll see the executable fetches the contents of the dialogue and then performs some sort of check.
Then we load our target in Olly and if you did it right, your screen should look something like this:
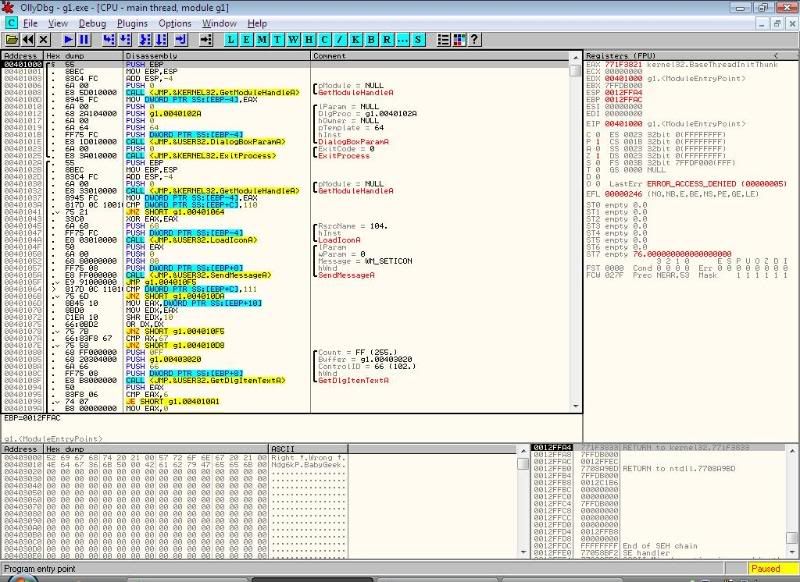
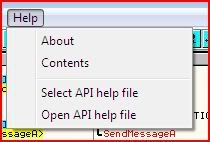
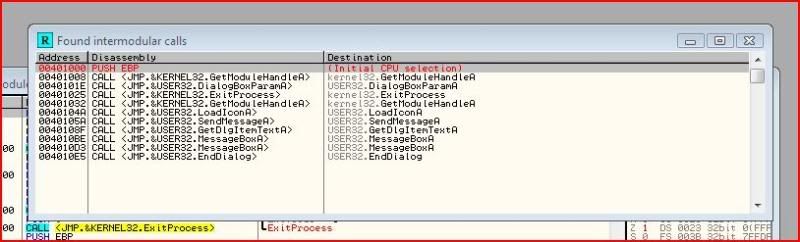
Since this is a fairly small program I started off by looking at all the API calls in the main module through the menu after right-clicking:
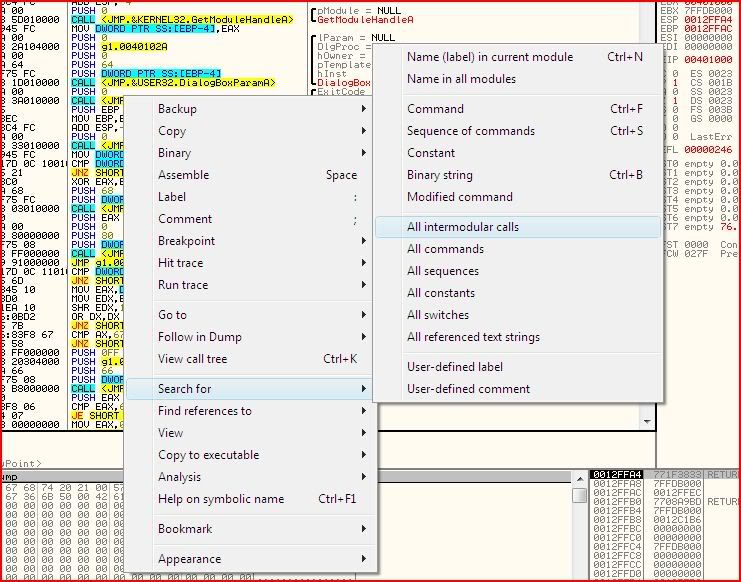
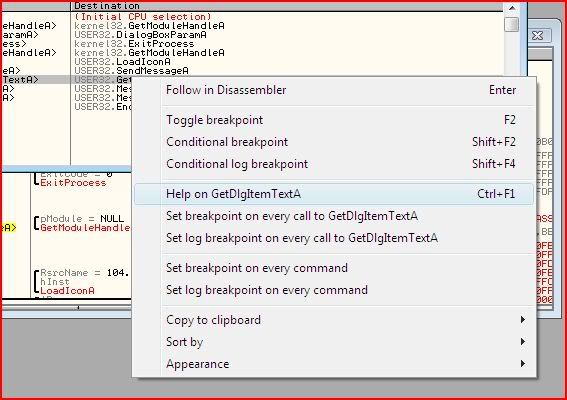
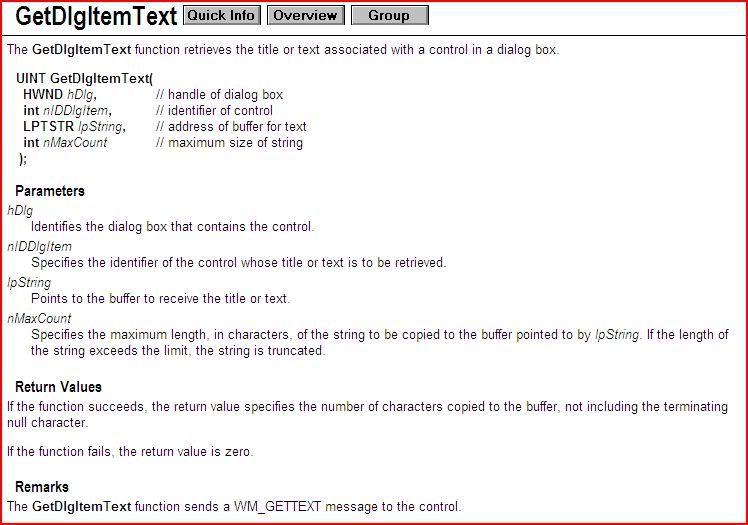
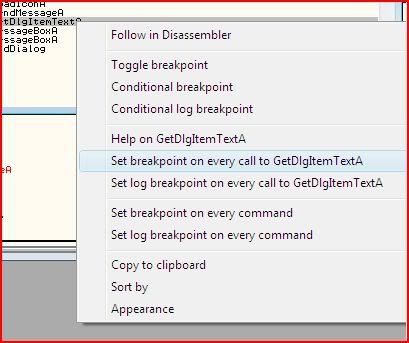
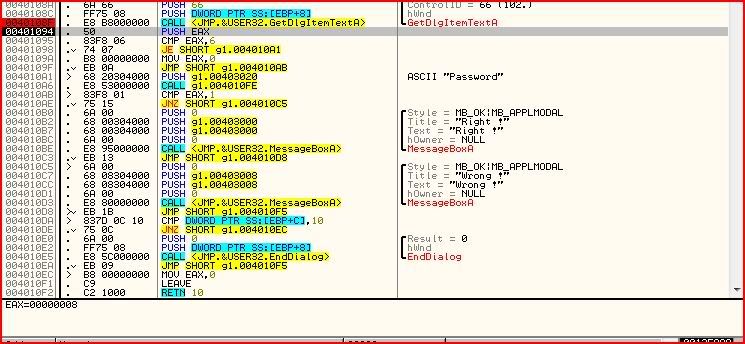
The important one that I wanted to look out for was GetDlgItemTextA. This fetches the information from the dialogue and stores it in a buffer. If you have the API help files installed, press Ctrl-F1 whilst selecting the call:
Now let’s set Olly to break every time that call is made. Right-click and on the menu there is an option to set breakpoints on all instances of the selected call:
And now we run the program with F9 or Debug >> Run or the Play button. Nothing happens particularly because that call hasn’t been made yet. There’s already a password typed in the dialogue box so let’s just try that by pressing check. Straight away Olly breaks where we set a breakpoint earlier:
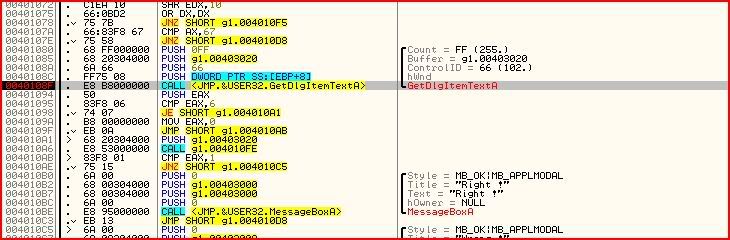
One of the parameters for that API is:
Buffer = g1.00403020
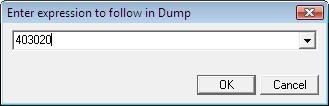
That means the dialogue contents are copied to the location 403020. So let’s go there in the hex window: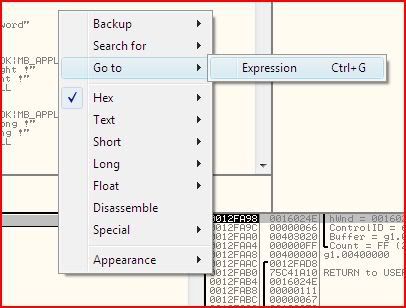
And sure enough “Password” is in the hex window at that location:

Now I start stepping through the code with F8 and I notice that the serial is checked for whether it is right or wrong at 004010AB with a “CMP EAX,1″. If EAX is 1 then the zero flag would be set since the two operands would be equal and code execution would continue to the “Right !” message box:
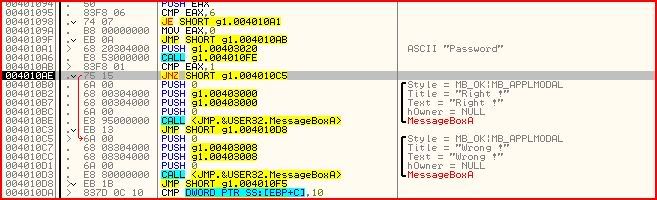
At the moment though EAX must be something other than 1 since we’re jumping to “Wrong !”. So I keep on stepping and sooner or later we get:
We could be retards at this stage and patch the JNZ to a JE or JZ and we’d keep going to the right message box but we’re looking for a serial here, not a cosmetics patch.
Anyway now we start thinking a bit. If the right or wrong message is determined by the value of EAX then there must be some sort of checking algorithm that sets EAX’s value, right ? If you were looking carefully at the states of each register whilst you were stepping the code, you might have noticed when EAX changed. Either way it should be obvious EAX is changed for the last time before the compare at the call at 004010A6:

But actually if we look at the code a little closer it seems that we’ll never even get to that call

8 is being pushed onto the stack each time instead of 6. This means that after “CMP EAX,6″ we would seemingly never get a situation where EAX is 6. But hang on. Where does the EAX get pushed from ? Well the GetDlgItemTextA we looked at earlier also counts the number of characters in the dialogue. So if we want to jump to the part where there is the check call, we will need a password with 6 characters. Let’s try:
We break at 0040108F again but this time when we step, stop at the check call:

First of all I’ll talk about the call a little bit. This call means the code is calling some sort of procedure or function. We need to look at what this is so we step into the call. Now that we are at the call, press F7 to step INTO it.
We land here:

Looking at those instructions though it doesn’t really seem like EAX is altered before the return at 0040110C. But if you look carefully you will see that there is another call inside this call at 00401105 where most likely the actual check is performed and EAX’s value determined. You know the routine, step over with F8 until on the call then F7 to step into it. We should land here:
Let me go through the instructions:
PUSH ESI
PUSH EDI
Pushes the values of those two registers onto the stack.XOR ECX,ECX
XOR EAX,EAX
XOR EBX,EBX
The xor operator will perform a exclusive OR operation on the two
operands. That means a bit will only result in a 1 if the corresponding
bit on each operand was different. So let’s say we xor’red the
following:10010001
11001110
It would result in 01011111. If you don’t understand this, it’s not that important but you do need to know that when you perform this operation on two of the same operands, then the result is zero. So we could just as well have done:
MOV ECX,0
MOV EAX,0
MOV EBX,0
So those three instructions made ECX, EAX and EBX zero.Now we get onto these two instructions:

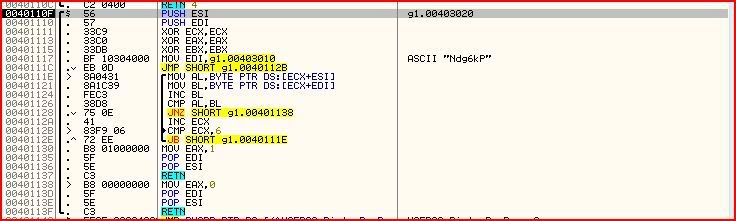
There’s no need to look in the hex dump to see what is at 00403010 since Olly tells us. So Ndg6kP is the value that is moved into EDI. Then the jump takes us into the middle of this loop:

Looks a little bit complicated right ? Let’s go through this instruction by instruction as well then. So first we have:
CMP ECX,6
JB SHORT g1.0040111E
ECX is compared to 6 and if ECX is below 6 then we jump to 0040111E.
Of course ECX was just zeroed a little while ago so let’s hope somewhere
along the line ECX will reach 6 otherwise we’ll be looping round
forever.MOV AL,BYTE PTR DS:[ECX+ESI]
MOV BL,BYTE PTR DS:[ECX+EDI]
If we look at our registers window we will notice this: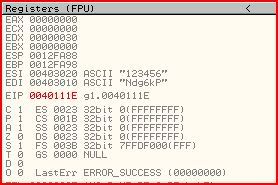
ESI holds our 6 character password we entered, ECX currently holds 0 and EDI holds the mysterious string Ndg6kP.
Since ECX is currently 0, we are just moving the first byte of ESI (1) into AL. Then the first byte of EDI (N) is moved into BL.
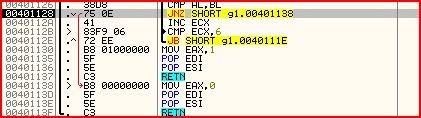
INC BL
CMP AL,BL
JNZ SHORT g1.00401138
INC ECX
BL is increased (first byte of Ndg6kP). AL is then compared to BL. If
they are not equal, we jump out of the loop. If they are equal, ECX is
increased. If you can’t see what is happening now I’ll clarify it:- ECX is acting as a counter as well as holding the offset from the start of each of the two strings (our own and the hardcoded one). This means AL and BL will have each of the other bytes of each string moved into it. ie. AL will hold “2″ after the next cycle of the loop, then “3″, etc. and BL will hold “d” then “g”, etc.
- We don’t want to jump out of the loop from the JNZ. Why ? Because we jump to 00401138 where 0 is moved into EAX which would mean we would get the “Wrong !” message box.
So to get the right password, we need to add 1 onto each byte of “Ndg6kP”. Since I’m learning assembly I quickly coded a keygen to add 1 onto each byte of any 6 character string I input so after entering Ndg6kP, my application gave me:
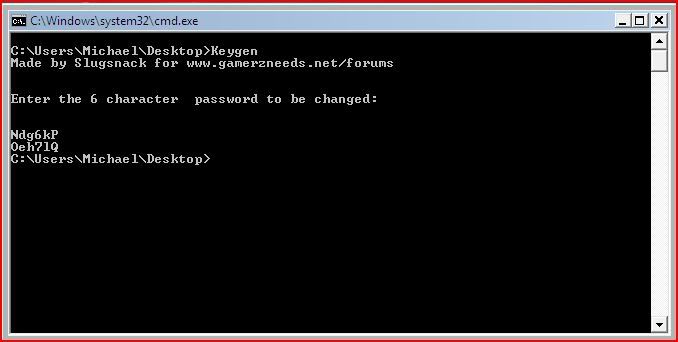
A word of advice, if you want to use my “keygen” you will need to run it through a console since it will exit so quickly you won’t be able to see anything. To do this, navigate to the folder holding the keygen and then type in the executable name (Keygen). So for me it was stored at my desktop so I changed drive to C: by entering to command prompt and typing “C:”. Then I navigated through the directories to my desktop by typing “cd Users/Michael/Desktop”, cd stands for change directory. Then to run the executable I just typed in Keygen and voila.
But anyway let me explain the rest of the call that we hadn’t covered yet:

You may notice that the first four lines of instructions in my screenshot and last four lines are nearly the same. The difference is what is moved to EAX (whether our serial is correct or not). Then EDI and ESI are popped which means their values are returned from the stack (whenever you use a register you need to make sure what you was in there originally stays there after you use it). Then we return to the first part of the call that we entered and from there back to the main disassembly.
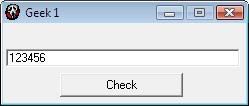
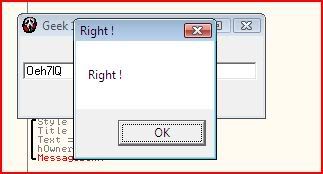
Now for the final test, we input what we think should be the right serial:
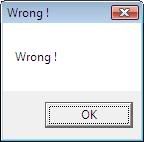
Heh Olly breaks on our set breakpoint on all calls to GetDlgItemTextA. You may remove that now by either double-clicking the hex dump part of that instruction or pressing F2 on it. Press F9 to run the application and..
That concludes this tutorial and hopefully you’ve learnt something, however little
 I actually wrote this series of tutorials for GzN but I figured there is an awesome learning community here.
Download File:
http://www.ziddu.com/download/3546933/ReverseMeandKeygen.rar.html
No comments:
Post a Comment