Once again, this reverseme was downloaded at http://www.osix.net/modules/geek/reverse.php, a challenge site.
Attached to this thread is the target we are reversing today (g2.exe).
So let’s jump straight into it ! First of all, let’s open up our target in Olly (F3) and run it (F9).
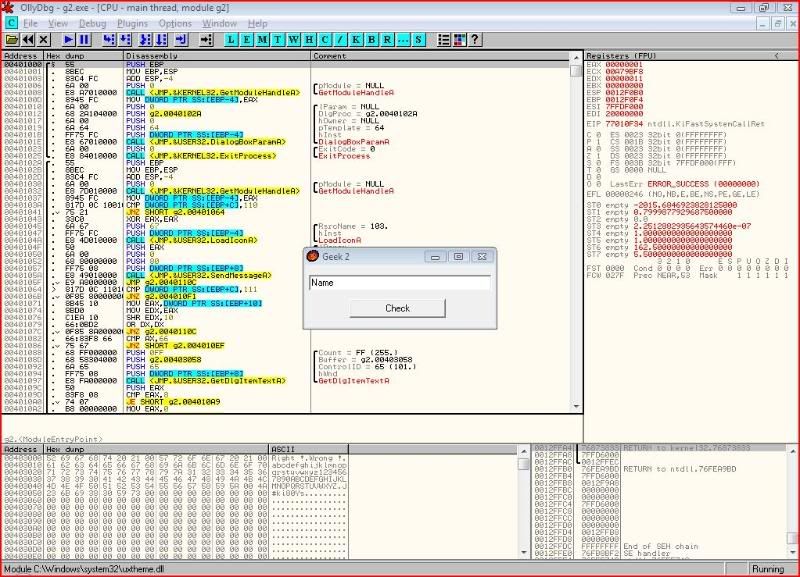
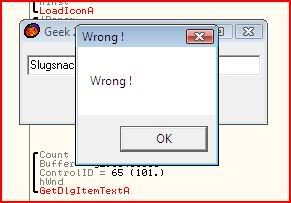
When we try and fiddle around a little bit, we see that a message box pops up to tell us the key we have inputted was wrong:
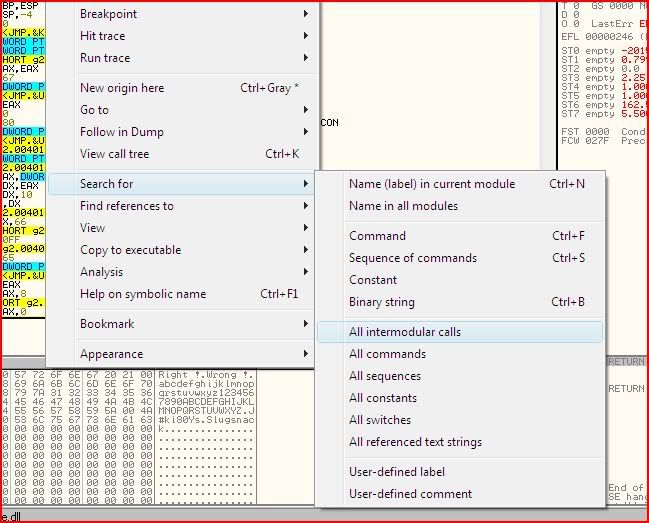
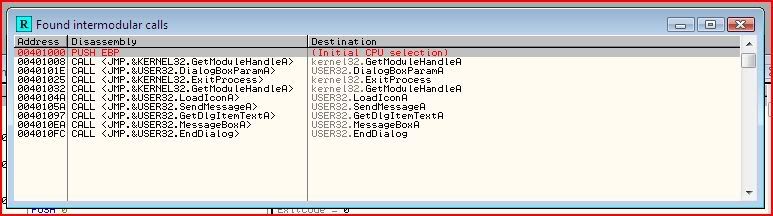
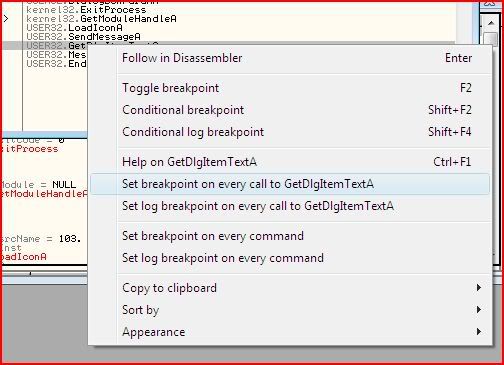
So just like last time, I look for the intermodular API calls:
Set a breakpoint on GetDlgItemTextA again so we can start examining the code from after we input our serial:
And when we try our wrong serial again, Olly breaks here:

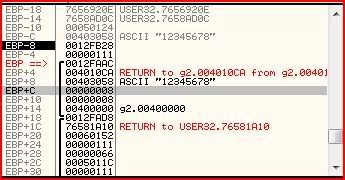
This time we can be a little smarter though. We can now see straight away that our serial was stored in 00403058 and we also know that the length of our serial is stored in EAX. But if you look down a few instructions we can see the following:

EAX is first compared to 8. If they are not equal (as is our case), we conditional jump at 004010AD is not taken and instead 0 is moved into EAX and we then jump unconditionally to 004010CA which eventually sadly takes us here:

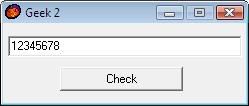
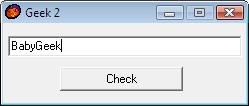
So once again, we can now tell how many characters our serial has to be. So this time I have chosen to re-enter a serial as “12345678″:
Just like last time we break on 00401097. First of all, notice that the only way we can jump to the right message box is if EAX holds 1 at 004010CC which holds the instruction:
CMP EAX,1
However between our breakpoint and the compare, there are two calls. For all we know either could be setting the value of EAX ready for the compare.

So how do we know which one of these calls to step into ? Well look at the instruction at 004010BA:
MOV EAX,8This instruction is between the first and the second call. Therefore, whatever change is made to EAX during the first call becomes irrelevant straight away so we can proceed to step straight to the second call. Once you get there, press F7 to step into it and you should land here:
Once again, let’s go through the instructions step by step.
PUSH EBP
MOV EBP,ESP
PUSH ESI
PUSH EDI
Almost every calculation in the assembly language requires the
manipulation of at least one register. So most of the time when you see
something like this, it means the current value of each register is
being pushed onto the stack to be returned later. Between that time, we
can use that register for whatever purpose we want. One
important rule to always obey is that if you are to use a register, then
make sure after you finish using it, whatever was stored in there
originally ends up back there. However, some registers should
be left well alone. For example, EIP. EIP holds the address of the next
instruction to be executed. Possibly you’ve manipulated this register a
little in game hacking or such but for the time being, I advise you to
leave it alone.So what is happening in the four lines above is that EBP, ESI and EDI are being pushed onto the memory stack. Most likely this means that these 3 registers will be manipulated later then their original values returned with the POP instruction. ESP is also moved to EBP between these instructions.
The next few lines are:
XOR ECX,ECX
XOR EAX,EAX
MOV ESI,DWORD PTR SS:[EBP+8]
MOV EDI,EBX
XOR EBX,EBX
JMP SHORT g2.00401132
So the three XOR instructions will make the values of ECX, EAX and
EBX zero. But let’s find out what EBP+8 is. Well EBP is 0012FA94, so
EBP+8 is 0012FA9C. So I look that up on the stack window and you can see
that that location holds our serial (12345678) which is located at the
address 00403058.
EBX is then moved into EDI. For some reason, EBX holds the ASCII value “BabyGeek”:

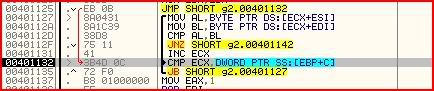
After this we jump to 00401132 which is smack in the middle of a loop that was similar to the one in part 1 of this series:
This time I will look forward a little to see what we are aiming for:
Now then, after this call, we hope to be able to somehow get the value of EAX to be 1. Therefore somewhere along the line we want to execute the instruction at 00401137 (MOV EAX,1). So how could we get this from the loop above ?
Well if you look at the loop, there are two jump instructions. At 0040112F, we have:
JNZ SHORT g2.00401142Going to 00401142 will mean that EAX’s value stays as zero though. Therefore we need to make sure this jump is not taken at all costs.
Now let’s look at the other jump:
JB SHORT g2.00401127This precedes the instruction:
CMP ECX,DWORD PTR SS:[EBP+C]Looking at the loop, we can see that EBP never changes and its current value is 0012FA94. So EBP+C is 0012FAA0 which is 8.
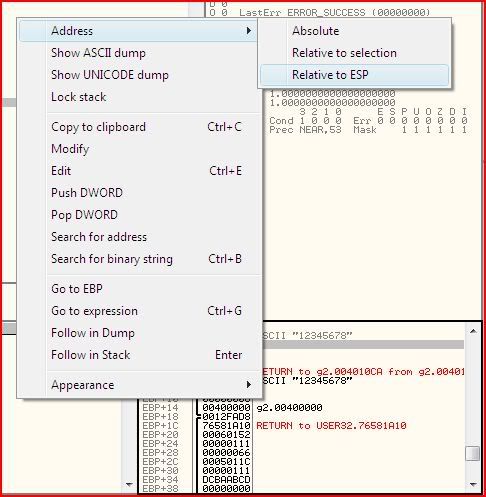
In case you were wondering how I could make the stack window show all addresses relative to EBP, you just right-click in the window then mouse-over the “Address” option and click whichever option you want:
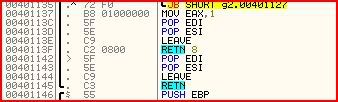
Anyway, back to the loop, we can see that ECX acts as a counter of how many revolutions of the loop we make. And as long as ECX is below the value of EBP+C (8), then we will keep going around. Once we finish 8 revolutions we will leave the loop and continue to 00401137 where a move of 1 to EAX awaits us
But to get there, we must avoid the jump at 0040112F. How can we do that ? Well that jump is a JNZ or jump not zero. There is a compare before that jump, therefore if the result of the compare is zero, we will not jump. That means the two operands at the compare must have the same value. If we look at the compare, we can see it is:
CMP AL,BL
So AL and BL must be the same value for all 8 of our loops. Now let’s
look at the instructions a little earlier that determine the values of
AL and BL:
The value held at ECX+ESI is moved into AL and the value held at ECX+EDI is moved into BL. We now know that ECX acts as a counter starting from zero and incrementing to 8. So let’s find out what EsI and EDI are. From the registers window:

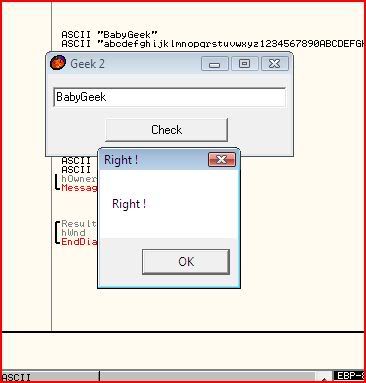
EsI holds our serial and EDI holds the string “BabyGeek”. So basically each byte (character) of our serial is compared to each byte of the string “BabyGeek” and if there is no difference then we will eventually proceed to the instruction we need at 00401137 (the alteration of EAX). That all means that our serial must be equal to the string “BabyGeek”.
So run the application until we get the “Wrong !” message, remove the breakpoint we set and then let’s try the serial “BabyGeek”:
If all has gone well, you should get this message:
If you read my first tutorial, you will see why I said this one seems even easier. Nevertheless, the next part of this series will contain something a little different

Donwload File:
http://www.ziddu.com/download/3547112/ReversingTarget.rar.html
No comments:
Post a Comment