Slugsnack’s Reversing Series [1]
Slugsnack’s Reversing Series [2]
Once again, this reverseme was downloaded at http://www.osix.net/modules/geek/reverse.php, a challenge site.
Attached to this thread is the target we are reversing today (g3.exe) and also a patched version of the target (g3-2.exe).
By the end of this series you will learn how to do simple patching, modify flags to control code execution, modify register values and also learn how to completely remove an API call from an executable.
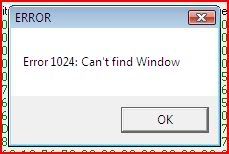
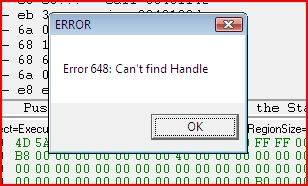
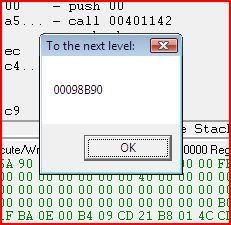
So let’s open up our target in OllyDbg as usual and run it:
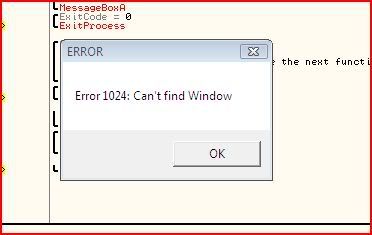
Uh oh. This can’t be good. As soon as we click “OK”, the process terminates.
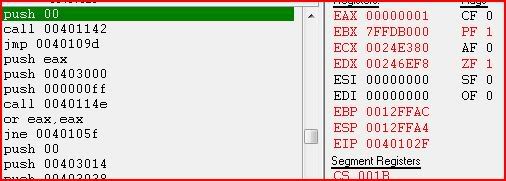
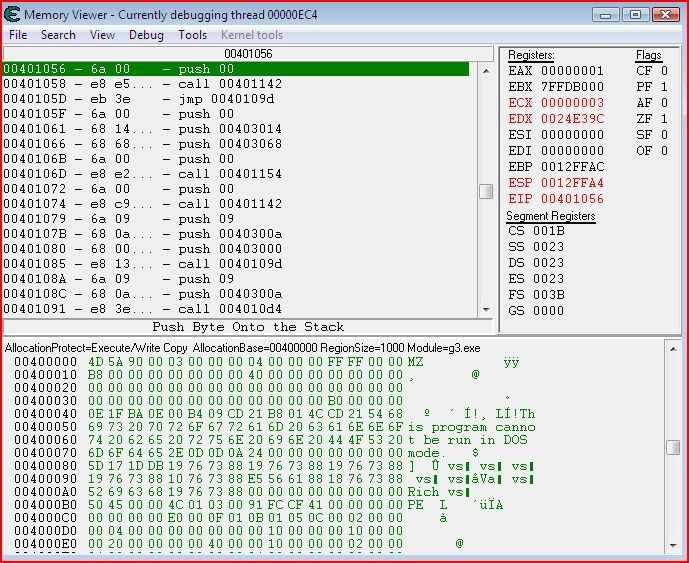
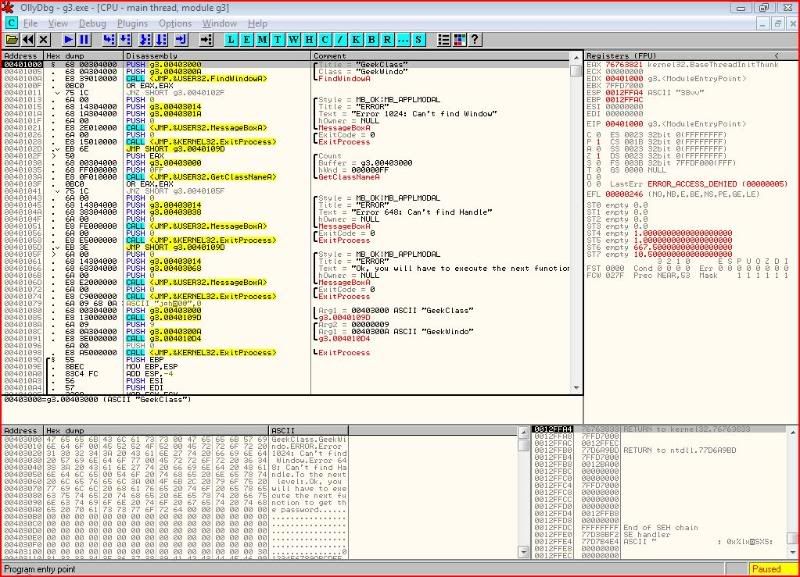
Restart the program (Ctrl-F2) and let’s have a look at the disassembly


So let’s assume all went well in the first three lines after our entry point. Now let’s look at the two lines after this:
OR EAX,EAX
JNZ SHORT g3.0040102F
So what does the OR operator do ? Well it takes the binary of the two operands and if either of the corresponding bits is set then the resultant bit will be set. This example shows you all possible outcomes from performing the OR operator:
0101 or 0011----0111Notice that the only way a 0 can be produced is if both starting bits were zero to start off with.
So if we perform the OR bitwise operation on two of the same operands then the result will only be zero if the operand started off with a value of zero. After this, I stepped down to this instruction and looked at the value of EAX:

And it turns out EAX at that point is always zero. Therefore the result of the instruction at 0040100F will always be zero.
Now we look at the conditional jump. It says that if the last instruction did not result in a zero then we will jump to 0040102F. Otherwise we will continue to the error message box which leads straight to ExitProcess. I think we can guess what that does
So how can we avoid this ? We have several choices. We could:
- Change the value of EAX during the FindWindowA call
- Change the status of the zero flag at the conditional jump
- Negate the conditional jump
The first method would probably be a little messy and I’d rather avoid it at this point in time.
Instead let’s find out how we could change the state of a flag. A flag has 2 states, either set or clear. One of the 32-bit registers of your processor, namely EFLAGS, holds a number of single-bit boolean values. One of these bits holds the value of our zero flag so if we were able to change its value at run-time, we could temporarily control the code flow.
In the assembly language, whether a conditional jump is taken is dependent on the status of a certain flag.
Strictly speaking there is one exception to this rule and that is the jump JECXZ. This jump is taken if ECX = 0. I can’t say I’ve ever seen this before though.
Anyway, let’s say we had the following instruction:
CMP AL,BLNow let’s give AL the value of 9 and BL the value of 8. When your processor compares these operands, it can see they are not the same (there is a difference). Therefore the zero flag is not set/is clear.
If we tried the same compare except AL and BL both had the value of 8, then the difference is 0. Therefore the processor will set the zero flag.
So at our conditional jump, we want the zero flag to be clear. I will now show you how we can change the state of a flag at a certain instruction. I will be coming back to the third option later.
To change the state of a flag at any point in an application’s execution, step the code until you are at that instruction, go to the relevant flag in the registers window and right-click it and choose “Reset” or “Set”, whichever one is relevant. Alternatively, select it and press enter or just double-clicking it will change its state.
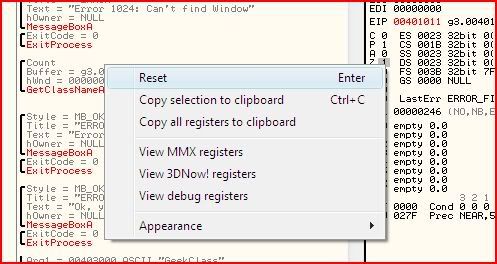
I have now cleared the zero flag at 00401011 and you can see that Olly tells us that code execution will jump past the calls to the bad message and process termination.

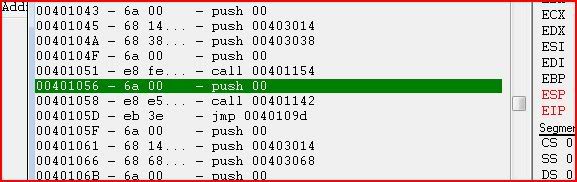
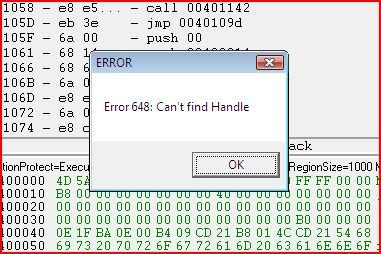
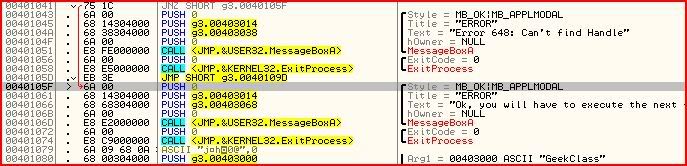
If you keep stepping, it is clear what has to be done again at 00401041:
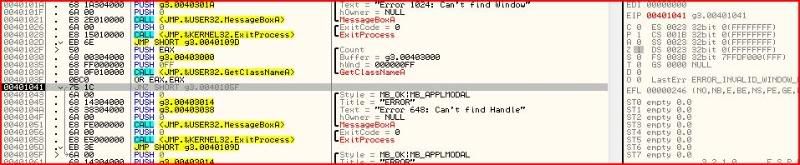

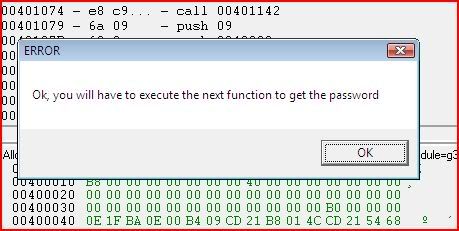
So we have now gotten past the second error message and there are now two more calls awaiting us. The first is MessageBoxA which will output the text “Ok, you will have to execute the next function to get the password”. But straight after that message box, we have a call to exit process. At first looks, it seems it’s impossible to avoid execution to the ExitProcess call but this is where register manipulation comes in

So far we have mainly been dealing with only a few registers that hold values because the programmer made them do so. I will now introduce you to the 32 bit register EIP.
EIP points to the address of the next instruction to be executed.
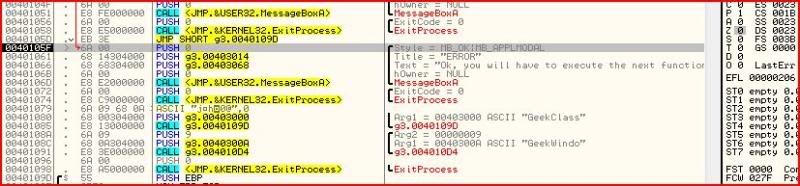
Let’s look at what we have at the moment. I am just about to execute the instruction that calls MessageBoxA:

Since that instruction has not yet been executed, EIP tells us that the next instruction to be executed is 0040106D.
Unfortunately I have not yet found out how to change EIP through OllyDbg. I will update this once I find out how (if you can) do that. Instead I will show you how to change EIP through Cheat Engine since after all, this is a games hacking site and CE is currently the most popular game memory-editing tool here

Update is here. You can in fact change EIP through OllyDbg
Step up to the address that you want to change it at. Then find the new
address you want EIP to be. Right-click it and click “New Origin Here”.Right, first of all open up CE 5.3 and then open up your target. CE 5.3 can be downloaded from:
http://cheatengine.org/
Or a direct link to CE 5.3′s download:
http://www.heijnen1.demon.nl/CheatEngine53.exe
Now then I’ll advise you right now that Cheat Engine’s debugger is not very friendly. If you don’t know what’s going on there are no helpful comments like OllyDbg. For this reason I will be running Olly beside CE.
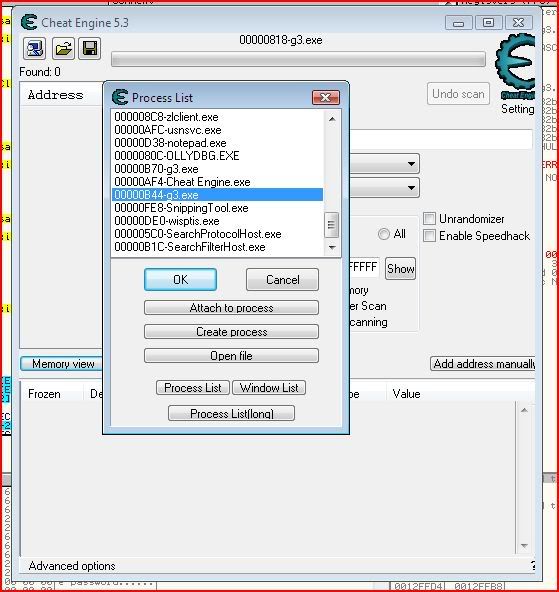
So after you open up CE and our reverseme, target the reverseme’s process:
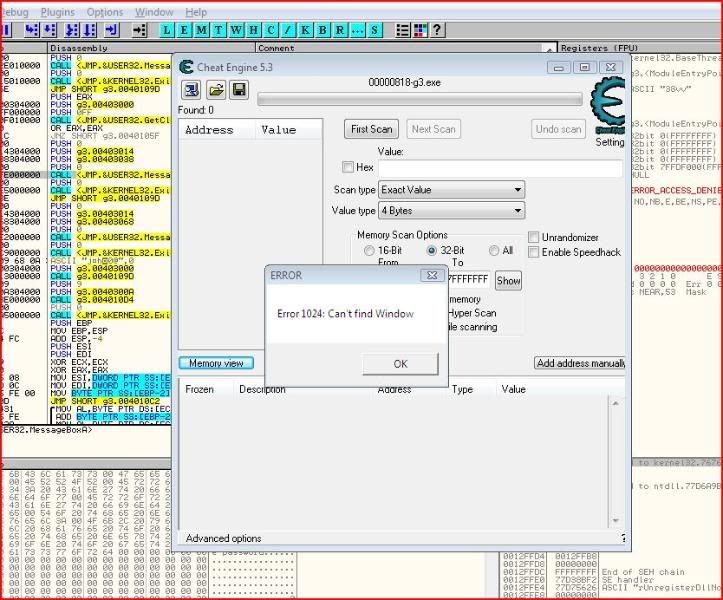
To target the reverseme, click the picture of a magnifying glass over a computer on the top left of CE’s interface. Select g3.exe and click “OK”:
Now then go to “Memory View” and your screen will probably look something like this:
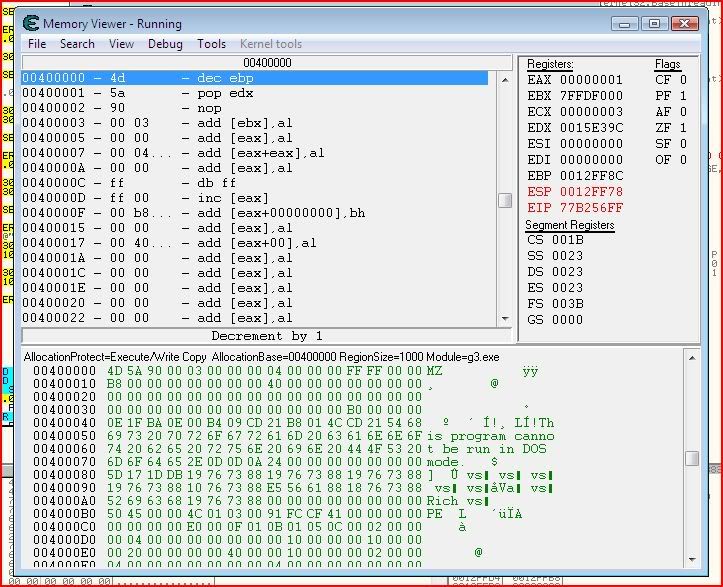
First of all, let’s try and find out where we are in the memory view. You’ll notice that as soon as you opened g3.exe, this window came up since we didn’t change any flags yet:
Now let’s look in Olly and see where the instruction for that would be:

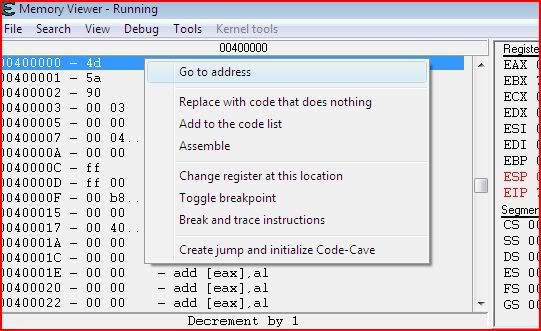
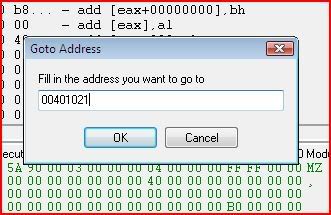
Yep, the call is at 00401021 so that’s probably the last instruction that was executed. So let’s go to there in CE’s memory viewer by right-clicking the instructions and clicking “Go to address”:

Now then, it’s definitely possible to change the state of a flag using CE but you already know how to do that with Olly. So let’s do exactly the same as we did in Olly except do it by changing EIP (ie. telling the application what the next instruction it is to execute will be – hopefully not ExitProcess).
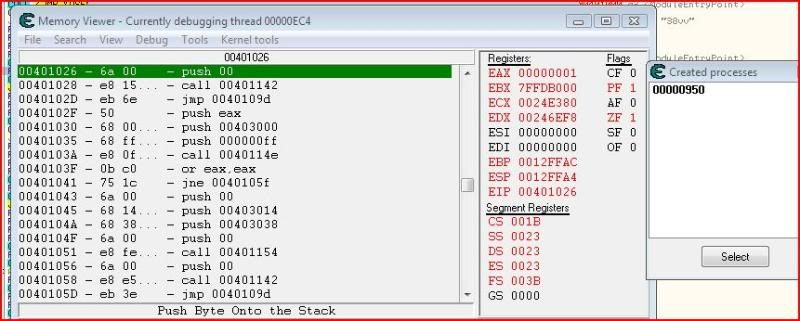
Let’s have a look at where the first call to ExitProcess is made:

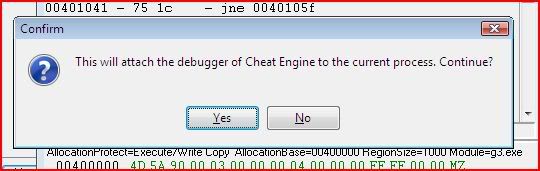
So we need to set a breakpoint on 00401026 and then change EIP before that instruction is executed. Setting a breakpoint there will make CE pause execution of the application before executing that instruction. Select the instruction at 00401026 in CE and press F5 to toggle a breakpoint. If done correctly, CE will prompt you to attach debugger (yes) and the instruction will go green:

Now let’s continue execution of the program. We can do this by clicking OK at the message box that came up:
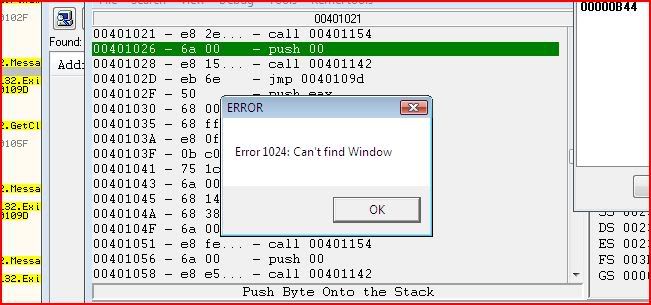
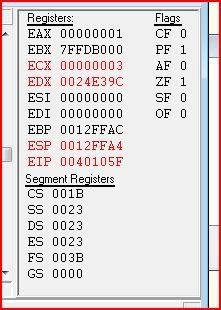
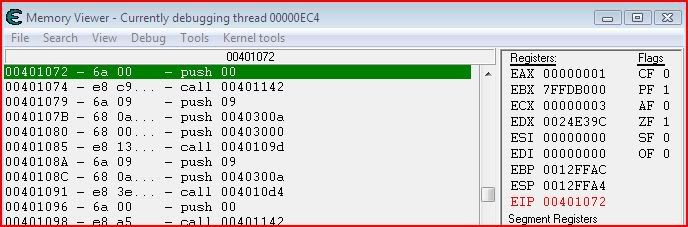
The instruction snaps to the top and the registers go red for everything that doesn’t have a value of zero:
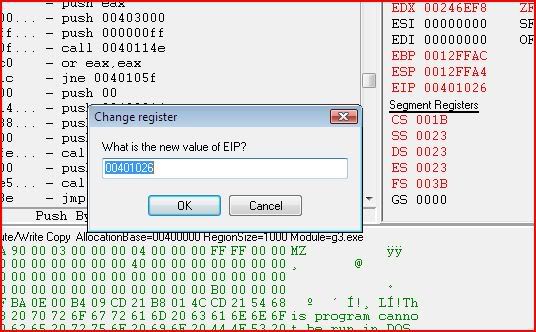
Now comes the part where we change EIP. If we continued right now without doing anything else, the call would be made to ExitProcess and our process would terminate straight away. So we need to tell the program that the next instruction to be executed isn’t 00401026, which is what EIP is currently. You can change EIP’s value by clicking it:
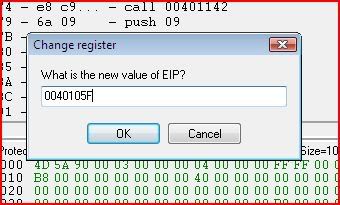
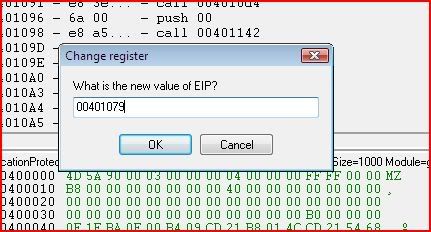
But what should we change its value to ? Well we still want GetClassNameA to be called but just not ExitProcess so if you look that up in Olly:
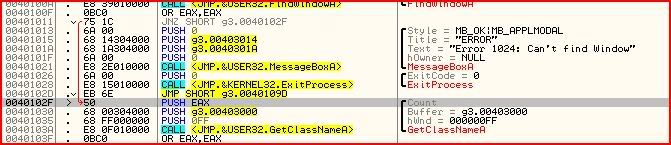
You can see that the call for GetClassNameA starts from 0040102F. So that’s what we must change EIP to in CE:
Notice EIP has now changed:
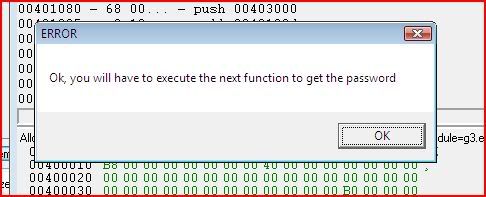
Press F9 to run and the program should now popup with our second message box:
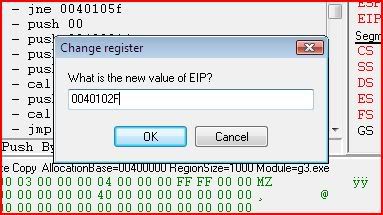
Same procedure, find where to set the breakpoint, set the breakpoint, run the program until it breaks, find what to change EIP to, change EIP:

Now we’ve changed EIP and according to Olly, once we run the program again (F9), the third message box will come up:
And once again, we look to see where we are:

And where we want to break:

Set a breakpoint there in CE:

Run the program:
CE should pause the thread and become the active window:
Now look in Olly for where we want to go next. Well we just want to go to whatever is after the ExitProcess call that we’re about to skip:

And change EIP on where we set our breakpoint in CE:
Once again we press F9 to play and we get this:
So we’ve now fooled the application into giving us what we want and along the way we’ve found out what EIP is and how we can change it to temporarily alter the execution flow.
But did you notice that everything we’ve done so far has been temporary ? Well that’s all about to change as we proceed to try out the third option I suggested (negate conditional jumps). We’ve finished with CE for today so you can close it down. I will now show you how you can patch an application so you can save your changes and make the code flow the way you want and stay like that !
Load up our target in OllyDbg fresh from the start again:
Now then let’s look at the first conditional jump. Last time, we just changed the zero flag so we’d jump to the right place:

But this time, let’s patch the actual jump so that it will always jump to the right place. We could negate the jump by replacing it with JE or JZ or we could make it jump unconditionally by changing it to a JMP. I’ve chosen to go with JE. Select the instruction you want to change and then hit spacebar. This window will pop up:
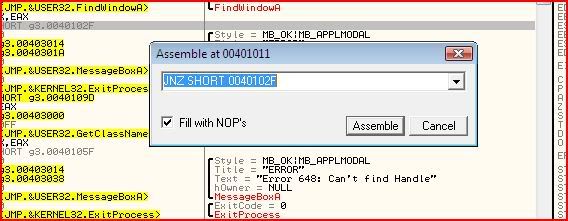
Since I’ve chosen to change it to a JE, I simply type in JE to replace the JNZ then click “Assemble”, then “Cancel”:


Do the same with the other jump at conditional jump at 00401041 and that instruction should look something like this:

Now for the final patch:

We have several options here. Two of those options are to overwrite the ExitProcess call with an unconditional jump to the message box showing the password later on. Hell, we could overwrite the call to the message box saying “Ok, you will have to execute the next function to get the password”.
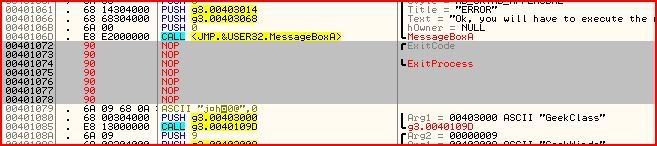
But I’d like to introduce a new method. Instead of writing our own instructions in to do something, we will write instructions in to do nothing. In assembly, an instruction like that is called NOP, or no operation. Quite simply when the processor sees that instruction, it will not perform any operation. So what we need to do is to NOP out the two lines that call the ExitProcess function. Then the processor will skip right over those lines and go straight to our good message box.
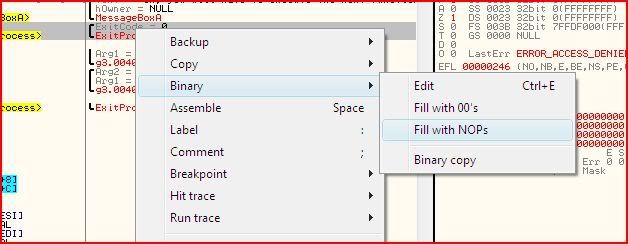
To NOP out instructions, select the instructions you want to NOP:

Right-click them and under the “Binary” menu, there is an option to “Fill with NOPs”, so click that:
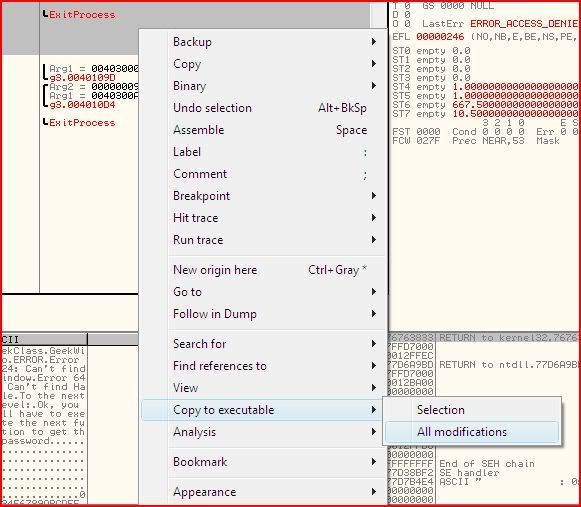
And now all we need to do is save our changes. Write click anywhere in the disassembly and click “Copy to executable” >> “All modifications”:
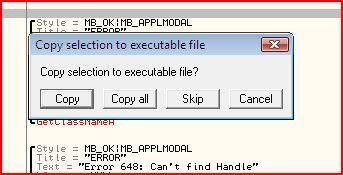
If you already had some instructions selected before, you may have to click “Copy all” at the prompt:
On the new window that pops up, click “Save file” and save your new executable under a new name:
Download Link:
http://www.ziddu.com/download/3550030/ReversingTarget.rar.html
No comments:
Post a Comment